Exports & Downloads
After running an optimization, CutOptim can export your results in multiple formats to suit different downstream needs — from printing a shop floor cut sheet to feeding a CNC controller. This article describes every export format.
Opening the exports
Run an optimization first — every export needs a finished plan. The toolbar then offers two menus, and which one you want depends on what you are producing:
Downloads — the file formats of the cutting plan itself:
| Menu item | Produces | Plan |
|---|---|---|
| Download PDF | Printable cut sheet (preview first) | Free |
| Download CSV | Raw cut list for a spreadsheet | Free |
| Download Excel | Formatted multi-tab .xlsx workbook | Pro |
| SVG | Vector diagram — 2D mode only | Pro |
| DXF (CNC) | CAD/CNC geometry | Pro |
Actions — things you do with the finished plan rather than formats of it:
| Menu item | Does | Plan |
|---|---|---|
| Add to offcut inventory | Saves this run’s leftovers to your Offcut Inventory | Pro |
| Print labels | Printable piece labels (preview first) | Pro |
| Quotation PDF | Customer quotation or internal report | Workshop |
Labels and the Quotation live under Actions, not Downloads. Downloads holds the five file formats of the plan; Actions holds the three things you do with it. Both menus sit next to Save in the top bar.
PDF, Labels and Quotation open a full preview before anything is written to disk. CSV, Excel, SVG and DXF download straight away.
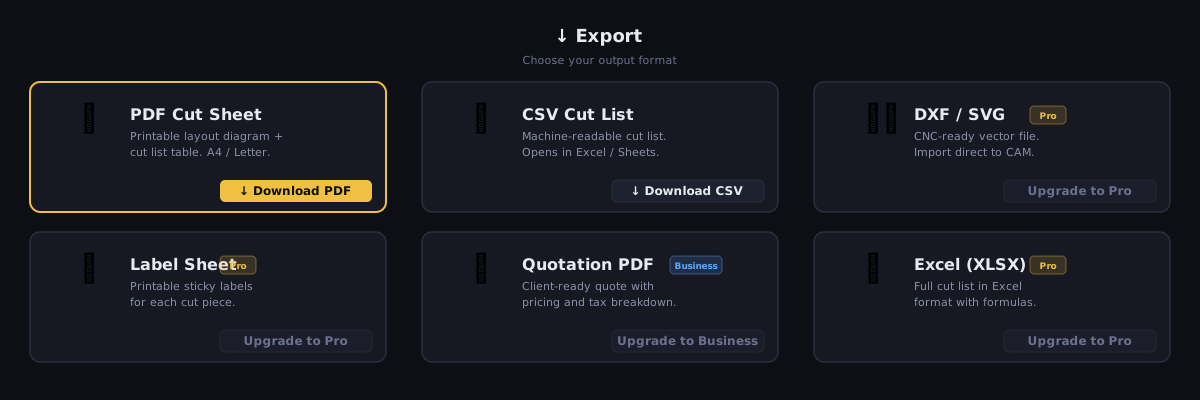
PDF — Printable Cut Sheet
The PDF export produces a multi-page document designed to be printed and used on the shop floor or sent to a client.
Document structure:
- Cover page Pro — a title page with your branding and a summary block: utilization, sheets or bars, parts, cuts, waste, and material cost when prices are set. It appears on Pro and Workshop only, and only once a job is big enough to be worth one: 3 or more sheets in 2D, 3 or more bars in 1D Linear, and 2 or more materials or 3 or more strands in Wood. Smaller jobs start straight at the letterhead page.
- Page 1 — Overview: a printer-friendly company letterhead, the job summary (utilization, waste, sheets/bars, parts, kerf, material cost) with a utilization bar, any shortage or unplaced-piece warnings, and a “How this plan was optimized” box explaining the method and the settings that shaped the run.
- Legend page: the colour key, on its own page so it can be printed and used as a standalone reference.
- Cutting plan: one framed block per sheet (2D) or per bar/strand (1D and Wood) — a dimensioned diagram with the piece list underneath. Identical units are merged into a single diagram carrying a “repeat: N×” badge, in all three modes, so a job that is twenty copies of one layout prints as one block rather than twenty pages. In Wood the plan is grouped per material, with one section per stock item and one per re-used off-cut.
- Material requirements (its own page): what you have to buy for this job, in two tables — New stock and Re-used off-cuts — each listing name, size, quantity and total area or length. Under the off-cut table a line names how many pieces to pull off the rack before you start. Sections you do not need are simply omitted: a run that re-used nothing shows only New stock.
- Detailed cut list (its own page): the full table of every cut (piece, dimensions, assigned sheet/bar). The column headers repeat at the top of every continuation page, and a Repeat column carries the multiplier — again in all three modes.
- Sawing plan Pro (its own page, all three modes): the Cutting Sequence as a printed list, in the order the cuts are made. On a sheet the columns are
#, Sheet, cutting stages, First cut direction, Position and Cut length; on a bar they are#, Bar, Order, Name and Position — a bar has no stage and no direction to report. The counting convention is stated in a line under the page title, so nobody has to guess which of the two cut numbers the page is showing. - Waste list (its own page): the sizes of the leftover offcuts and how many of each, with a third Reusable column carrying Yes or No. Reusable rows are sorted to the top, and a line under the table states the threshold in your own numbers. A one-line waste summary closes the page (total waste + how many offcuts are reusable).
- Sheet layouts (2D only, at the very back): every board repeated at full size, one per landscape A4 page, drawn as large as the paper allows.
From the second page onward a thin running header carries the company name and the plan title, and the body content starts at a consistent height on every page.
The key figures under the sawing plan
Under the sawing-plan table sits a framed strip of the numbers the operator needs at a glance: Cuts (the number of steps), saw passes — printed only when it differs from the cut count — Cut length, and cutting stages.
Cut length is printed only where one was actually measured. 2D measures it from the cut tree and Wood from the known cross-section, so both always carry it. 1D Linear carries no cross-section, so by default it prints positions and no length — but set Profile width in Advanced settings (a field that appears in 1D Linear only) and the sawn length is printed here too, every counted cut crossing the profile once. Left at 0, the default, the figure is simply omitted rather than guessed.
Why the sheet layouts are at the back
Inline in the portrait reading flow each diagram gets about 174 × 80 mm, which on a 2800 × 2070 mm board is roughly 1:16 — legible as a picture, useless as something to work from. A landscape A4 page gives roughly three times the area and matches the aspect of a typical sheet, so the parts are big enough to read off at the machine.
Those in-flow copies are kept, so the document still reads end to end on its own; the full-size pages are a repeat of them. Putting the repeats last also keeps the reading document — summary, cut list, sawing plan, waste — continuous instead of interleaved with full-page artwork.
How the Reusable column is decided
The column is not an opinion: it is your own minimum offcut setting, applied to the leftover, and the PDF prints the rule with your numbers filled in.
- 2D — a remnant counts as reusable when both of its sides clear the minimum. A long thin strip is not useful, however long it is.
- 1D and Wood — a remnant counts as reusable when the leftover length clears the minimum.
The column prints the words Yes and No rather than a tick, because the embedded subset font carries no symbol glyphs. See Minimum offcut for how to set the threshold.
Re-used off-cuts are marked wherever they appear. A sheet or bar that came out of your Offcut Inventory is labelled (off-cut) next to its number and carries the name you gave the piece, so the person cutting knows to fetch it from the rack instead of opening new stock.
Pro Pro: clean PDF with no upgrade footer. Company branding (logo, name, slogan) appears on the page-1 letterhead and in the running header. See Company Branding.
Free: the PDF is fully usable — a small “made with CutOptim” upgrade line appears in the footer of each page. There is no diagonal watermark over the diagrams.
The legend, the material requirements, the detailed cut list, the sawing plan and the waste list each start on their own page, so for large jobs you can print just the pages you need at each station — and in 2D you can hand the operator a single full-size landscape page per board from the back of the document.
CSV — Cut List Spreadsheet
The CSV export produces a comma-separated values file that can be opened in Excel, Google Sheets, or any spreadsheet application, or imported into workshop management systems.
CSV columns (2D mode):
| Column | Description |
|---|---|
piece_label | Piece name as entered in the Parts table |
width | Piece width |
height | Piece height |
qty | Quantity (one row per individual piece) |
sheet_index | Which stock sheet this piece is cut from (1-based) |
sheet_label | Stock sheet label |
pos_x | X position of piece on the sheet (bottom-left corner) |
pos_y | Y position of piece on the sheet |
rotated | true if the piece was rotated 90° from its input dimensions |
CSV columns (1D mode):
| Column | Description |
|---|---|
piece_label | Piece name |
length | Cut length |
qty | Always 1 per row |
bar_index | Which stock bar this piece is cut from |
bar_label | Stock bar label |
position | Distance from the bar’s start end |
CSV export is available on both free and Pro plans.
The CSV file uses UTF-8 encoding with a BOM for compatibility with Excel on Windows. When opening in Google Sheets, choose File → Import and select UTF-8.
Excel (.xlsx) — Formatted Multi-Sheet Workbook Pro
The Excel export produces a ready-to-print, branded .xlsx workbook — a richer, formatted alternative to the raw CSV. It opens in Microsoft Excel, LibreOffice Calc, Google Sheets, and Apple Numbers.
Sheets (tabs):
- Overview — a branded header (your company logo and details on Pro), the job meta (project, date, mode, unit), the stock supply mode (unlimited or limited), a summary block (yield %, waste, sheets/bars, pieces, kerf, total cost), and a “How this was optimized” section listing the method, the settings that shaped the run, and the outcome. In limited stock mode it also adds a “Not cut” list naming any pieces that did not fit.
- Cut list — the full per-piece table for the active mode (2D / 1D / wood), with a frozen header row and column filters.
- Cutting Sequence — the sawing plan as its own tab, in all three modes, inserted directly after the Cut list because it is what the operator works from and therefore belongs ahead of the material and waste accounting. In 2D the columns are
#, Sheet, cutting stages, First cut direction, Position and Cut length; on a bar they are#, Bar, Order, Name, Position and Cut length — in 1D Linear the length column stays empty unless you have set Profile width in Advanced settings, because linear stock carries no cross-section of its own to measure across. The totals (cuts, saw passes, cut length, stages) are repeated at the bottom of the tab, so it stands alone when it is the only page taken to the saw, followed by the one-row-is-one-fence-setting note. Without Pro the tab is simply absent. - Materials — stock requirements aggregated by size, with quantities, area or length, and cost (when pricing is set), plus a total row. When the run re-used saved leftovers, a second Re-used off-cuts table is appended below it, so what you must buy and what you already own stay separate.
- Waste — every leftover listed by name, size and quantity — reusable and non-reusable alike — with a Reusable column carrying ✓ or ✗ (reusable = at or above your minimum-offcut size), reusable rows first, plus a total-waste summary and the count of reusable offcuts. In limited stock mode it also lists any pieces that could not be cut.
- Quotation — (Workshop only, when pricing is set) an itemized material cost table with subtotal, VAT, and grand total.
Formatting: branded header bands, alternating row shading, sensible column widths, currency and percent number formats in your locale, a frozen header row and filters on the table sheets, and print-ready page setup (A4, fit-to-width, repeating header rows) so the workbook prints cleanly straight away.
Pro Pro: company branding — your logo (embedded into the Overview sheet) and company details (name, address, phone, email, registration number) — appears just like on the PDF. See Company Branding. The Quotation tab is added on Workshop.
The Excel export downloads directly (there is no preview step). Numbers are stored as real numeric cells, so you can sort, filter, and build your own formulas on top of the cut list and material tables.
SVG — Vector Diagram Pro
The SVG export produces a scalable vector graphics file of the cutting diagram. SVG files can be:
- Opened in Adobe Illustrator, Inkscape, or any vector editor
- Embedded in design documents or websites
- Used as a reference for manual marking out
SVG export works in 2D Panel mode only. In 1D Linear or Wood cutting the menu item reports that SVG is available for 2D plans, and no file is produced. Use PDF or DXF for 1D plans.
SVG structure:
- One file for the whole plan. Every sheet in the result is stacked vertically into a single SVG, one below the other with a gap between them — not one file per sheet, and not a ZIP.
- The export is a copy of the diagram you see on screen, so pieces keep their fill colour, outline and the size/name labels drawn on them.
- Piece labels are
<text>elements inside the piece group. - Dimensions are in the unit the result was generated in — millimetres or inches.
The pieces are drawn as <rect> elements inside <g> groups, but they do not carry the piece name as an id, and offcut areas are not exported as separate shapes. If you need machine-readable geometry with identifiable parts, use the DXF export, which separates stock, parts and labels onto their own layers.
Common use cases:
- Providing a cut plan to a client in vector format
- Using as a template for CNC toolpath generation in a vector editor
- Overlaying on a material photograph for visual verification
DXF — CNC / CAD File Pro
DXF (Drawing Exchange Format) is the standard file format for transferring cut paths to CNC routers, laser cutters, plasma cutters, and waterjet machines, as well as CAD software.
What the DXF contains:
- Every stock sheet, bar or profile as a closed polyline on the
STOCKlayer - Every cut piece as a closed polyline on the
PARTSlayer - All text (piece names, sizes, sheet/bar captions) on the
LABELSlayer - Coordinates in the unit the result was generated in — millimetres or inches — with the drawing unit declared in the file header (
$INSUNITS), so your CAD scales it correctly on import
The DXF uses three fixed layers — STOCK, PARTS, LABELS — not one layer per piece. Turn off LABELS in your CAD to get clean geometry for toolpathing, and STOCK to keep only the parts.
DXF export works in all three modes: 2D sheets, 1D bars and Wood profiles.
Compatibility:
The DXF is written in the R12 format — the most widely supported DXF revision — which virtually all CNC controller software and CAD applications read, including:
- AutoCAD 2010 and later
- Fusion 360
- SolidWorks (via import)
- Mach3, Mach4, LinuxCNC
- VCarve, Aspire (Vectric)
- RhinoCAM
DXF export provides the outlines of pieces for nesting reference. It does not include toolpaths, speeds, depths of cut, or G-code. You will need to add toolpaths in your CAM software (e.g. VCarve, Fusion 360 CAM) before sending to a CNC machine.
Label Sheet Export Pro
The Label Sheet export produces a printable sheet of piece labels, one label per demand piece. Labels are designed to be printed on standard A4 label sheets and applied to cut pieces for identification during assembly.
Each label includes:
- Piece label / name
- Dimensions (W × H or length)
- Quantity
- Sheet or bar number the piece comes from
- Custom text field values (if configured — see Custom Text Fields)
Label sheet layout: A4 sheet, 4-column grid — one label per demand piece, designed to be printed and stuck onto cut panels for identification during assembly.
Sort order options:
- By sheet — All labels for Sheet 1 first, then Sheet 2, etc. Best for shop floor use: cut a sheet, immediately label all its pieces before moving on.
- By label — Alphabetical order. Best when assembling from pre-cut stock and working from a project schedule.
Run the optimization first, then generate labels immediately. Print and cut the label sheet before moving material to the saw, so labels are ready the moment each piece is cut.
PDF Preview
Three exports go through a preview step before the file is downloaded: the PDF cut sheet, the Panel Labels sheet and the Quotation. Clicking one of those opens a preview modal with a full-page iframe PDF viewer, so you can review the document before committing to the download. CSV, Excel, SVG and DXF have no preview — they are written to disk the moment you pick them.
Preview workflow:
- Click any export button (PDF, Labels, Quotation)
- The preview modal opens — scroll through all pages
- Click Download PDF to save the file
- Or close with ✕ to cancel without downloading
This prevents wasted paper from accidentally exporting the wrong job or wrong sheet range.
Quotation Export Workshop
The Quotation export produces a client-facing pricing document summarising material costs for the job.
What it includes:
- Company branding (if configured — see Company Branding)
- Client/project details (filled from project notes)
- Line items: each stock sheet type with quantity used, unit price, and line total
- Subtotal, optional markup percentage, and total
- Optimisation summary (yield %, waste %, sheets used)
Quotation is not a full invoice. It is designed as a material cost summary to include in a client quote or job costing report. For full invoicing, export the CSV and import it into your accounting software.
| Feature | Type | Description |
|---|---|---|
| Markup % | number | Percentage markup added to the material subtotal. Useful for adding handling, waste, and profit margin. |
| Currency symbol | text | Symbol prepended to all price fields. Default: $. Change to £, €, or any other symbol as needed. |
| Quotation notes | text | Free-text field for terms, validity period, or additional notes. Appears at the bottom of the quotation. |
| Include offcut credit | boolean | When enabled, the estimated value of saved offcuts is shown as a line credit, reducing the net material cost. |